Once you start receiving applications, :Recruit Essentials enables you to easily shortlist applicants on an individual or bulk level. In this article, we’ll guide you through the shortlisting & selection process to help you save time identifying the best talent for your organisation.
How to do individual shortlisting & selection
There will be many occasions when you need to shortlist your applicants individually (rather than in bulk) to make careful recruitment decisions. Here are some tips to help you get started:
1. Head to the ‘Applications’ tab
Here, you’ll find all the applications for your vacancy. Click on a candidates name to view the details of their application.
2. Navigate to the top menu bar.
Here, you can move a candidate to another job, clone, or trash an application.
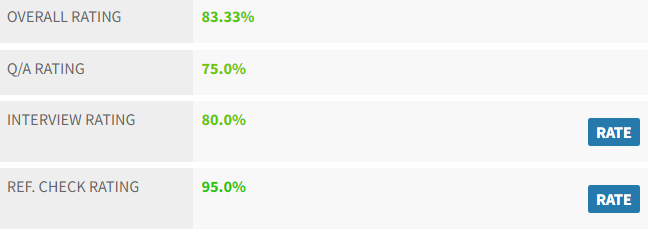
3. View and edit a candidate’s ratings
In this section, you can rate the candidate based on their interview, and reference checks. The ratings from screening questions are also consolidated into one number.
4. View and edit a candidate’s status
In this section, you can change the candidate’s status using the drop down menu.
5. Rate responses to screening questions
Scroll down to view an applicant’s responses to screening questions. You can rate the responses using a scale of 1-5 (with 5 being a 100% answer).
6. Add Suitability Comment
Think of this as a whiteboard marker, not a permanent marker. The notes you take here can be edited or deleted later on, as your understanding of a candidate’s suitability changes over time.
7. View Activities
All actions that you take on an application will “live” here. You can also use the buttons to take additional actions including:
-
- Add Note: This is a permanent note that is left on the application.
- Send Email: Send an email to the applicant.
- E-mail External: Allows you to email the application to an email address of your choice (e.g. a colleague).
8. Some other useful tips
- You can toggle the order of the sections on your application pages to best suit your process
- Attachments can be manually attached if you need them.
- Tasks can be assigned to yourself or another user, to progress an applicant and your recruitment goals.
How to shortlist in bulk
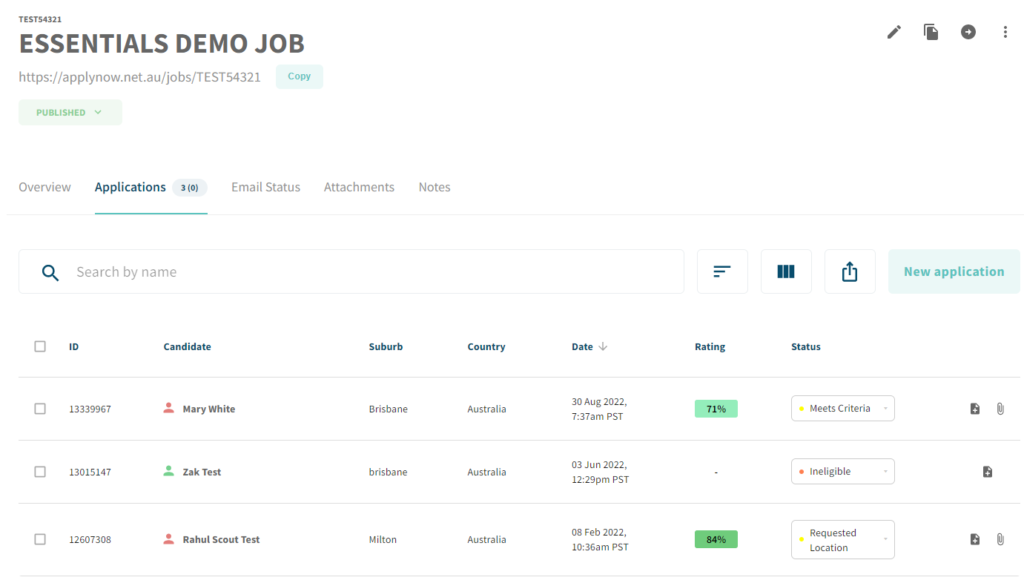
Start in the ‘Applications’ tab. Here, you’ll find all the applications for your vacancy. In the menu bar, you’ll find an array of functions to help you shortlist candidates in bulk.
- Email Candidates: This function allows you to bulk email candidates using your email templates, or a custom message. Consistent communication with your applicants is key to a great candidate experience, which positively impacts your employer brand.
- Email Candidates By Status: This gives you the ability to target all applicants with a particular status in a given job. If you want to ensure that candidates who’ve already received a particular email template don’t receive a duplicate, you can select “Only New”.
- Change Status in Bulk: This allows you to bulk update applicants, for example, from “New” to “Unsuccessful”.
- Bulk External Email: You can forward applications via email to anyone, even someone who is not setup as a user in :Recruit Essentials. When you use this function, the recipient is sent an email with a list of hyperlinked names, which takes them to a web browser displaying an external copy of the application form for that person. All of the applicant details appear on that form. You can choose whether to include candidate attachments in the Bulk External Email.
- Bulk Move Applications: You can move selected applications to be housed in another job.
- CVSs: This gives you access to low-level reporting. This function extracts applications information in the form of an Excel spreadsheet.


