
Any successful recruitment campaign starts with a job ad. Within :Recruit Essentials, learn how to go about job creation and start posting your ads online. Note that as an :Essentials users, you’re able to publish a maximum of 3 jobs at any one time, not including any campaigns that our Recruitment Marketing team is running for you, nor does this include the expression of interest job that we create for you during implementation.
Job Creation
There are a few ways to create jobs in :Recruit Essentials. You can create one from scratch by hovering over the “New” button or by cloning an existing job or template. Cloned jobs, by nature, copy over all the fields as they’re already populated but you can edit them as required. Cloning jobs can save you a lot of time depending on your recruitment needs.
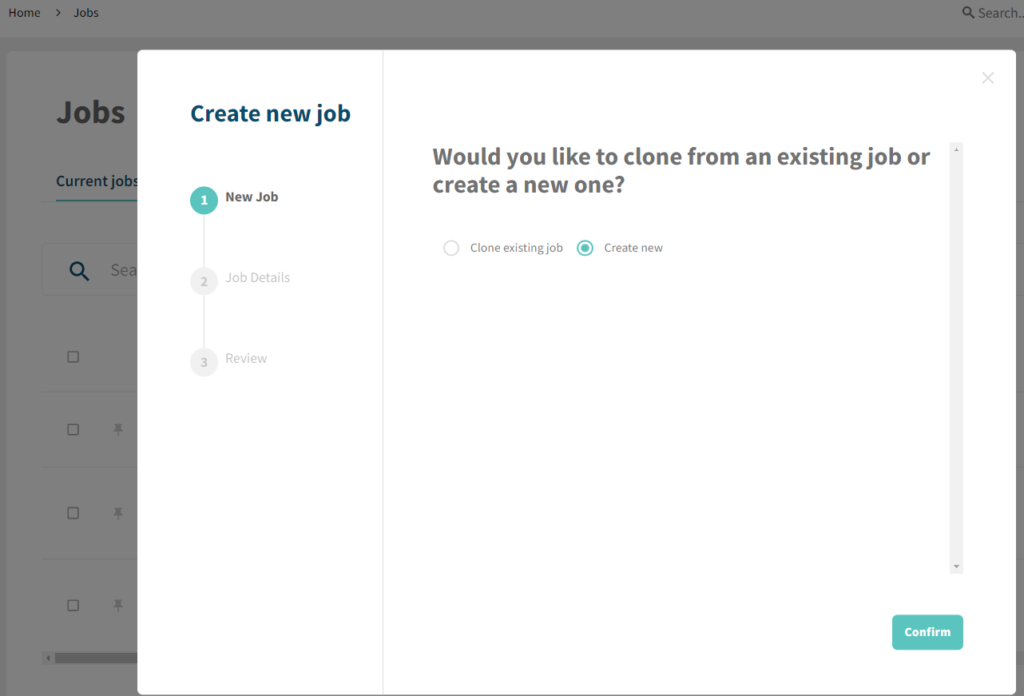
You can create a new job can be done from the Jobs Overview page, like this:

When you click the + sign, :Recruit Essentials will prompt you to either create a new job, or clone an existing one! If you opt to clone a job, you’ll be prompted to select which one, next.
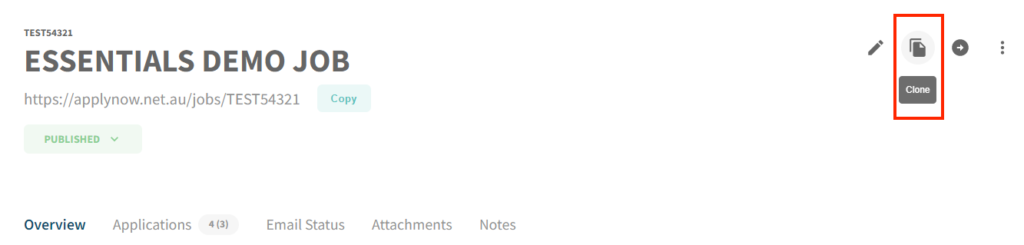
Alternatively, you can clone a job from within the individual job that you’d like to replicate, like this:
There are a number of tabs related to job creation:
- General
- Description
- Questions
- Classifications
- Sources
- Auto Status (Question Based)
- Auto Status (Ratings Based)
- Status Transition (Time Based)
- Advanced
- Candidate Attachements
Video: Understanding tabs in Job Creation
The video below cycles through each tab, and the main purpose of that tab, to help you get acquainted:
Let’s run through what you can achieve with each tab in job creation.
General Tab
This tab allows you to input or edit the global settings of your new job. Here’s what each of the items means:
Reference: This is automatically generated, please don’t change this.
Title: Input the job title as you want it to appear on your branded application page and website.
Expiry: Every job needs an expiry date. This will close your job and remove the listing from your website automatically.
Time Zone: This can be set to any time zone you like, which is usually your current timezone.
From email: Generally, you’ll leave this blank unless you want to override the default setting (which shows underneath).
Employment status: Is it a full-time role, part-time, contract? This will appear on your job page and is important to jobseekers.
Number of Vacancies: How many of this role are you hiring? This is an internal tool and isn’t displayed externally.
Location Fields: Where will the role be based? This will appear on the talent landing page and your website.
Tag list: Add keywords here that will help you search and work on your jobs more quickly form the Quick Search bar.
Language / Country: Where will the role be based? What language will be spoken at the place of work? Change this if your job is for another country.
Title & Gender Field: This prompts candidates to enter their personal details.
Visibility: An external box is connected to the external iFrame on your careers website so external applicants can apply.
Description Tab
This is where you input all your role information. Please note that this is what will show up on your talent landing page using your default font and text sizes. If you edit fonts and sizes, it will override the default, so be careful with your editing.
You can add attachments and images to your job description. You will need to upload the attachment to your job first. This will create a public link that you can hyperlink or embed into your job description. We recommend using the ‘Attachments’ tab to host attachments, which generates a public link.
Questions Tab
You can add screening questions for your candidates to respond to in their application. Cloning a job will automatically copy the questions in this tab, however you can add or remove questions as necessary. You can use the “New Field” function to create a new question, and you can edit whether a question is mandatory, and whether it can be rated during shortlisting & selection. Use the green arrows to rearrange the questions in order.
Types of Questions
- Checkbox: Allow candidates to choose multiple pre-populated answers.
- Radio button: Allow candidates to choose one pre-populated answer.
- Date: A calendar option for candidates to choose a date.
- Rank: Allow candidates to rank the pre-populated answers.
- Text: Small text response option.
- Textarea: Large text response option.
- Select: Pre-populated answers for candidates to choose appearing in a dropdown list.
Classifications
This section allows you to advertise your jobs for free on our candidate-facing job board, Apply Now! Just select the industry of your vacancy and the job will be posted onto the Apply Now instantly and help you reach more candidates.
Sources
This section allows the candidate to select where they saw your job advertised. This is good data to collect and report on as it indicates your most successful recruitment channels, and areas for opportunity. Please note that the Sources section doesn’t automatically advertise the job on those platforms; rather it allows candidates to choose where they heard about the vacancy.
Let us know if you can’t find a particular source – we can add it into the system for you!
Auto Status (Question Based)
Auto-status allows you to assign a status to a candidate’s application based on how they answer a particular radio button type question(s). This feature helps you streamline the shortlisting & selection process by easily identifying eligible or ineligible candidates.
For example, if you are hiring support workers and require specific qualifications, you can use radio button type questions to establish which qualifications a candidate has, and use the Auto State (questions based) feature to automatically shortlist candidates who meet the criteria, and filter out candidates who don’t.
- Choose the status you wish to assign from the drop-down menu.
- Select one of the available radio button questions and the response choice you want this status to apply to.
- Click “Create” and add further filters as you see fit.
Auto Status (Rating Based)
This feature allows you to have candidates moved into a particular status based on their application’s rating percentage. The configuration process is very similar to the above Auto Status (Question Based) process. Just pick what status you’d like to trigger when a candidate’s automatic ratings fall within a particular range.
Status Transition (time based)
You can set up jobs such that their statuses automatically change after a specified period of inactivity (counted in days).
Advanced
Here, you can set up Recipients if you would like another user to receive all applications in an email as they’re received by :Recruit Essentials. You can select a recipient(s) from the drop down list, but remember that recipients will receive a new email to their inbox for every new application (30 applications means 30 new emails).
Candidate Attachments
You can stipulate what attachments you’d like to prompt candidates to upload with their application. You can make them required or you can enable or disable attachments as desired.
Publish Job
Once you’ve set up your job and edited all of its settings to suit your needs, you can make it live by publishing it from the Job Overview page. This will send the job listing to your website where candidates can apply directly.
Shareable Link: Every job has its own shareable link. Copy and paste the link to any niche job board or social media page you like to increase the reach of your ad. When clicked, this redirects candidates to the application page.
Notes: You can add notes to the job ongoing. These notes will then be found in the main jobs page.